
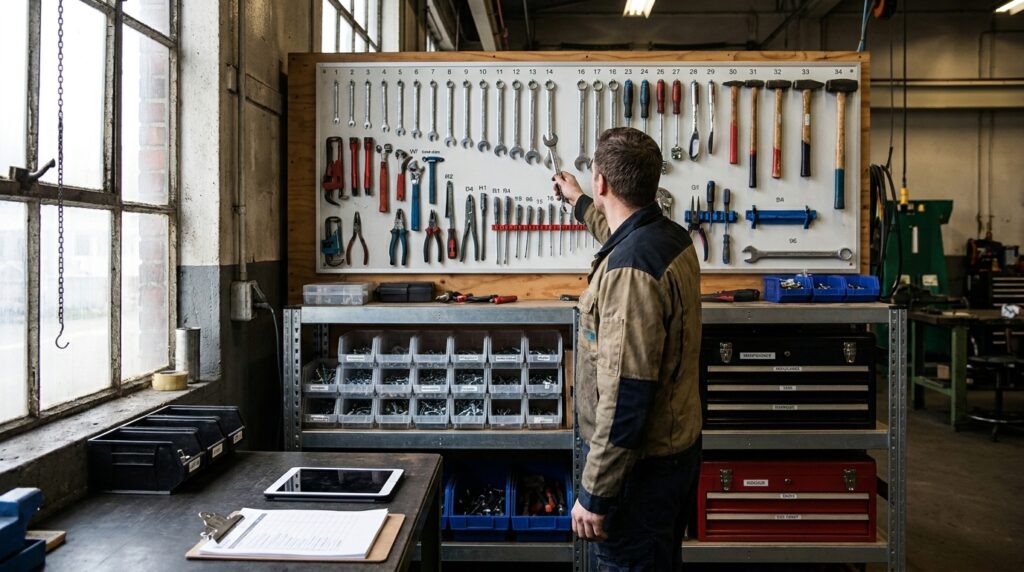
Setting up a well-organized maintenance tool crib isn’t just about tidiness; it’s about efficiency, safety, and saving valuable time and money. When your team can quickly find the right tool for the job without rummaging through piles or hunting down missing items, everything runs smoother. This guide will walk you through the essential steps to create a tool crib that works for you, not against you.
Planning Your Tool Crib Layout
Before you even think about putting a tool away, you need a solid plan. This stage is crucial for long-term success and avoiding the chaos that can easily creep back in. Think about the space you have, the types of tools you need to store, and how your team actually uses them. A little upfront thought here saves a lot of headaches later.
Assessing Your Space and Needs
Take a good look at the area designated for your tool crib. How much room do you actually have? Is it a small closet, a dedicated room, or a section of a larger workshop? Measure everything carefully. Consider things like ceiling height, existing shelving, lighting, and access points.
Next, make a comprehensive list of every tool that needs to be stored. Don’t just think about the big, obvious items. Include hand tools, power tools, specialized equipment, calibration devices, safety gear, spare parts, and consumables like lubricants or cleaning supplies. Categorize these items. Grouping similar tools together will make storage and retrieval much easier. For example, all wrenches in one area, all screwdrivers in another, all measuring instruments together.
Consider the frequency of use for different tools. Items that are used daily should be readily accessible, perhaps at eye level or within easy reach. Less frequently used tools can be stored higher up or in less prime real estate. Think about the workflow of your maintenance team. Where do they usually start their tasks? Can the tool crib be positioned to minimize travel time?
Choosing the Right Storage Solutions
The type of storage you choose will significantly impact the organization and effectiveness of your tool crib. There’s no one-size-fits-all answer, so you’ll need to match your storage to your tools and space.
For hand tools, pegboards are a classic for a reason. They allow you to hang tools in plain sight, making it easy to see what you have and what might be missing. You can even trace the outline of each tool onto the pegboard to create a visual cue for its proper place. Tool chests and cabinets with drawers are excellent for smaller items and offer more protection. Look for drawers with dividers or foam inserts to keep things organized within each drawer.
Larger power tools often require more robust storage. Shelving units are a must. Adjustable shelving is ideal because it allows you to customize the height to accommodate different tool sizes and avoid wasted vertical space. Heavy-duty shelving can support the weight of even the largest machines.
Specialized equipment might need custom solutions. Think about cradles, racks, or custom-built shelves designed specifically for those items. For items that are used in kits, consider dedicated bins or cases that keep all the necessary components together.
Don’t forget about consumables and spare parts. Bins, drawers, and cabinets are good for these. Clear bins are fantastic because you can see the contents without opening them. Labeling is absolutely critical for this category.
Consider mobile storage solutions as well. Rolling tool carts can be incredibly useful for bringing tools directly to a job site within the facility, and they can be easily moved back to the crib for storage and replenishment.
For those interested in optimizing their maintenance operations, a related article titled “Essential Tips for Streamlining Your Tool Management System” can provide valuable insights. This article offers practical strategies to enhance efficiency and organization within your maintenance tool crib. To read more, visit Fredon Handling.
Implementing a System for Organization
Once you have your layout and storage solutions in place, it’s time to implement a system that keeps everything in order. This is where the real work of organization happens, and it requires clear rules and consistent practices.
Developing a Labeling and Inventory Strategy
Labeling is arguably the most important aspect of an organized tool crib. Without clear labels, your storage solutions are just empty containers. Every shelf, bin, drawer, and even individual tool location (especially on pegboards) should be clearly labeled.
Start with broad categories. For example, a shelf might be labeled “Wrenches” or “Drill Bits.” Then, within drawers or bins, use more specific labels like “Combination Wrenches – Metric” or “Phillips Head Screwdrivers – #2.” For individual tools on pegboards, label the hook or the area where the tool belongs.
Consider using a numbering system for tools, especially if you have multiples of the same item or if you need to track them for inventory purposes. This can be as simple as “Wrench 1,” “Wrench 2,” or a more sophisticated serial number.
An inventory system goes hand-in-hand with labeling. Decide how you will track what you have. This could be a simple spreadsheet, a dedicated inventory management software, or even a barcode system. Your inventory should include the tool name, description, quantity, location, acquisition date, and possibly a maintenance or calibration schedule.
Regularly update your inventory. When a tool is borrowed, mark it as out. When it’s returned, mark it back in. When a tool is damaged or replaced, update the inventory accordingly. This system helps prevent tools from going missing and ensures you know when to reorder or replace items.
Establishing Check-Out and Check-In Procedures
A robust check-out and check-in procedure is vital for maintaining control and accountability within the tool crib. This prevents tools from being misplaced, lost, or borrowed indefinitely.
For check-out, the process should be straightforward but thorough. When a team member needs a tool, they should have a clear process to follow. This might involve filling out a simple logbook (physical or digital) that records:
- The name of the person borrowing the tool.
- The date and time of borrowing.
- The specific tool being borrowed (including any identifying numbers).
- The estimated return date.
- The purpose of the borrowing (optional, but can be helpful for tracking tool usage).
If you’re using a digital system, this could be as simple as scanning a barcode on the tool and then entering your employee ID. The system automatically records the transaction.
The check-in process is equally important. When the tool is returned, it should be inspected for damage or missing parts. The logbook or digital system should be updated to reflect the return, including the date and time. This is also the time to note any damage that occurred during use.
Implement a policy for overdue tools. What happens if a tool isn’t returned on time? This could involve a gentle reminder, a notification to a supervisor, or even temporary restrictions on borrowing privileges. The goal is to encourage timely returns without being overly punitive.
Consider having a designated person or a rotating responsibility for managing the check-out and check-in process. This ensures consistency and accountability.
Maintaining and Improving Your Tool Crib
Setting up an organized tool crib is only half the battle. The real challenge lies in maintaining that organization over time and continuously looking for ways to improve it. This requires ongoing effort and a commitment to the system.
Conducting Regular Audits and Inspections
To ensure your tool crib stays organized and functional, regular audits and inspections are essential. These aren’t just about tidying up; they’re about verifying that your system is working and identifying any potential issues before they become major problems.
Schedule these audits at regular intervals – perhaps weekly for high-traffic areas or monthly for less frequently used sections. During an audit, you’ll want to:
- Verify Inventory Accuracy: Compare the physical inventory against your digital or logbook records. Are all the tools accounted for? Are there any discrepancies?
- Check Tool Condition: Inspect each tool for signs of wear, damage, or malfunction. This is a critical part of preventative maintenance. Are blades dull? Are handles cracked? Are power cords frayed?
- Assess Organization: Is everything still in its designated place? Have tools started to migrate to incorrect locations? Are labels still legible and accurate?
- Review Usage Patterns: Look at your check-out logs. Are certain tools being borrowed more frequently than others? Are there tools that are rarely used? This information can inform future purchasing decisions or highlight potential obsolescence.
- Inspect Storage Integrity: Are shelves stable? Are drawers sliding smoothly? Are pegboards secure? Address any structural issues immediately.
Based on your audit findings, take corrective action. This might involve:
- Updating your inventory records.
- Sending damaged tools for repair or replacement.
- Re-organizing tools that have drifted from their proper locations.
- Replacing faded or missing labels.
- Addressing any safety concerns identified during the inspection.
These audits are not meant to be punitive. They are a proactive approach to ensuring that your tool crib remains a valuable asset to your team.
Fostering a Culture of Responsibility
An organized tool crib doesn’t happen by accident. It thrives when everyone on the maintenance team understands their role in keeping it that way. Fostering a culture of responsibility is about making the tool crib a shared asset that everyone takes pride in.
Start with clear communication. Explain the benefits of an organized tool crib to your team: reduced frustration, faster task completion, improved safety, and cost savings through better tool care. When people understand why a system is in place, they are more likely to buy into it.
Provide thorough training on the established procedures. This includes how to use the check-out/check-in system, how to properly store tools, and what to do if they notice a problem. Don’t assume everyone knows how to do things the “right” way; demonstrate it.
Encourage feedback. Ask your team for suggestions on how to improve the system. They are the ones using the tool crib every day, and they might have practical insights you haven’t considered. Listen to their ideas and implement changes where feasible.
Lead by example. If you are responsible for the tool crib, make sure you are consistently following the procedures yourself. Your actions will set the tone for the rest of the team.
Recognize and acknowledge good practices. When you see someone diligently returning tools to their proper place, checking them in correctly, or reporting a damaged tool, offer a word of appreciation. Positive reinforcement can go a long way.
Consider implementing a “tool crib champion” program, where a different team member is designated each month to oversee the crib, ensure procedures are followed, and report any issues. This can rotate responsibility and keep everyone engaged. Ultimately, building this culture means making the organized tool crib a collective goal, not just a management directive.
Optimizing Tool Crib Operations
Once the foundational elements of organization and maintenance are in place, you can focus on fine-tuning your tool crib operations for maximum efficiency. This involves looking at how tools are utilized and how the crib can better support the team’s workflow.
Managing Tool Replenishment and Replacement
An organized tool crib is only as good as the tools it contains. Keeping up with replenishment and timely replacement of worn-out or damaged tools is crucial for preventing downtime and ensuring your team has what they need.
Your inventory system will be your best friend here. Regularly review your stock levels for consumable items like drill bits, cutting fluids, or tape. Set reorder points so that you automatically know when it’s time to purchase more before you run out. For items that have a longer lead time, plan your orders further in advance.
For tools that are prone to wear and tear, establish a replacement schedule. For example, if a particular type of saw blade typically lasts for 100 cuts, track its usage and plan for its replacement after approximately that many uses, or when it reaches a certain level of dullness. This is where regular inspections become invaluable.
When a tool is deemed beyond repair or obsolete, ensure it’s removed from inventory and from the tool crib promptly. Don’t let broken tools clutter the space or be mistaken for usable ones.
Consider a system for “tool repair kits.” For frequently used tools that can be partially repaired (e.g., replacing a worn handle on a hammer or a damaged grip on a screwdriver), having spare parts readily available can save time and money compared to replacing the entire tool.
When purchasing new tools, consider not only the initial cost but also durability, warranty, and ease of maintenance. Sometimes, investing a little more upfront in a higher-quality tool can save you money in the long run through fewer replacements and repairs.
Leveraging Technology for Enhanced Efficiency
Technology offers a wealth of opportunities to elevate your tool crib from merely organized to highly efficient. While manual systems work, digital solutions can automate processes, provide deeper insights, and streamline operations.
Inventory Management Software: Move beyond spreadsheets. Dedicated inventory management software can automate stock tracking, generate purchase orders, set reorder alerts, and provide detailed reports on tool usage, maintenance history, and depreciation. Many systems integrate with barcode scanners, making check-out and check-in incredibly fast and accurate.
Barcode Scanning: Assign unique barcodes to each tool. When a tool is borrowed, scan its barcode and the employee’s ID. When it’s returned, scan it again. This virtually eliminates errors in logging and provides real-time data on tool location and availability.
RFID Technology: For higher-value or critical tools, consider Radio-Frequency Identification (RFID). Tags attached to tools can be read wirelessly by readers, allowing for rapid inventory counts and real-time tracking of tool movement within the facility. This is particularly useful for preventing loss or theft.
Digital Check-Out/Check-In Systems: Many modern inventory management systems offer mobile apps or web-based interfaces for check-out and check-in. This allows team members to log tools in or out from their mobile devices, reducing the need to physically go to the tool crib for every transaction.
Maintenance Scheduling Software: Integrate your tool crib inventory with maintenance scheduling software. This can automatically flag tools that are due for calibration or preventative maintenance, ensuring they are taken out of circulation at the right time.
Data Analytics and Reporting: The data collected by these technologies can provide invaluable insights. Analyze tool usage patterns to identify underutilized equipment or areas where more tools are needed. Track repair costs to identify tools that are consistently problematic. Use this data to make informed decisions about purchasing, maintenance, and process improvements.
Implementing new technology requires initial investment and training, but the long-term benefits in terms of time savings, reduced errors, improved accountability, and better asset management can significantly outweigh the costs.
Setting up an organized maintenance tool crib is essential for improving efficiency and reducing downtime in any facility. For those looking to enhance their understanding of maintenance best practices, a related article on effective inventory management can provide valuable insights. You can explore this topic further by visiting this resource, which offers a wealth of information on optimizing tool storage and management strategies.
Addressing Common Tool Crib Challenges
Even with the best planning and systems, challenges can arise in managing a tool crib. Anticipating these common issues and having strategies to address them will help you maintain a smooth operation.
Dealing with Missing or Damaged Tools
This is perhaps the most frustrating challenge for any maintenance team. Missing tools mean lost productivity and unnecessary replacement costs. Damaged tools can be a safety hazard and lead to failed repairs.
Prevention is Key: As discussed, a robust check-out/check-in system is your first line of defense. Clear labeling and visual inventory (like pegboards with tool outlines) help identify missing items immediately. Regular audits are crucial for catching things before they go missing entirely.
Clear Policies: Have a written policy outlining what happens when a tool goes missing. This might include:
- An immediate report to a supervisor.
- A period of searching the work area.
- Consequences for recurring issues, such as deduction from pay for unrecovered tools (depending on company policy and local labor laws).
- A process for reordering lost items.
Damage Protocol: When a tool is returned damaged:
- Inspect and Document: Immediately inspect the tool and document the damage, noting who last used it and when.
- Categorize Damage: Determine if the damage is due to normal wear and tear, or if it’s the result of misuse or negligence.
- Repair or Replace: If it’s wear and tear, follow your standard repair or replacement procedure. If it’s due to misuse, follow your company’s disciplinary policy.
- Immediate Removal: Remove the damaged tool from circulation and clearly label it as “Out of Service” or “Needs Repair” to prevent accidental use.
Investigate Systematically: If tools are consistently going missing, it’s time for a deeper investigation. Are there blind spots in your security? Is the check-out system being bypassed? Are there unauthorized access points? Talk to your team – they might have insights into why this is happening.
Managing High-Demand and Specialized Tools
Some tools are essential for daily operations and are in constant demand, while others are highly specialized and used only occasionally but are critical when needed. Both present unique management challenges.
High-Demand Tools:
- Redundancy: For tools that are critical and in high demand, consider having multiples. If a key wrench or a common type of bit is always out, having a spare readily available can prevent significant delays.
- Prioritized Access: Ensure these tools are always in their designated, easily accessible locations. If your check-out system allows it, prioritize these items for quick retrieval.
- Usage Monitoring: Track the usage of these tools closely. If they are constantly out, it might indicate a need for more, or that they are being overused and are prone to premature wear.
Specialized Tools:
- Secure Storage: These tools are often expensive and may be used infrequently. Store them in a more secure location within the tool crib, perhaps a locked cabinet or a designated area with limited access.
- Calibration and Maintenance: Specialized tools, especially measuring instruments or precision equipment, require regular calibration and maintenance to remain accurate and functional. Implement a strict schedule for this and ensure it’s documented.
- Clear Usage Guidelines: For highly specialized tools, ensure that only trained and authorized personnel are allowed to use them. Provide clear instructions and ensure proper handling procedures are followed.
- “Just-in-Time” Procurement: For very specialized tools that are rarely needed, consider a model where they are rented or borrowed from external suppliers on an as-needed basis, rather than investing in and storing them permanently. This can be more cost-effective if the usage is truly infrequent.
Effectively managing both types of tools requires a flexible approach that balances accessibility, security, and the specific needs of each item.